
Green screen effects have been a staple in the film and video production industry for years, allowing creators to place their subjects in virtually any setting by removing and replacing the green background. However, not everyone has access to a professional green screen or the studio space required for it. Thanks to advancements in AI technology, video background removers have made it easier than ever to achieve green screen effects without the need for expensive equipment.
This tutorial will walk you through how to use background removal tools to simulate green screen effects, giving you the freedom to create professional-quality videos with custom backgrounds, no matter where you shoot your footage. Whether you’re producing YouTube content, marketing videos, or any creative projects, this guide will show you how to leverage AI-powered tools like CapCut to replace video backgrounds with ease.
Why Use a Background Remover for Green Screen Effects?
Using a video background remover to simulate green screen effects offers several benefits, especially for creators with limited resources or those working in less-than-ideal environments. Here are a few reasons why background removal tools are an excellent alternative:
Convenience and Accessibility
Traditional green screen setups require specific lighting and a physical screen to ensure clean and effective removal during post-production. With background removal technology, you can skip these requirements and shoot your videos anywhere. AI-powered tools can automatically detect the subject of your video and remove the background, making it incredibly easy to apply new backgrounds in just a few clicks.
Cost-Effective Solution
Setting up a green screen environment can be costly, especially if you’re renting studio space, buying a professional screen, and setting up lights. Background removers eliminate these costs, allowing you to achieve the same effects at a fraction of the price. All you need is a video editor with background removal capabilities, such as CapCut’s video editing software.
Versatility in Custom Backgrounds
Whether you’re simulating exotic locations, professional office spaces, or abstract backgrounds, background removers give you endless possibilities. You can customize your background to suit the theme of your video, making it more engaging and visually appealing. This flexibility is particularly useful for content creators who want to maintain a consistent style across their videos.
How to Simulate Green Screen Effects with a Video Background Remover
Now that you understand the benefits of using a background remover, let’s dive into the steps to simulate green screen effects. CapCut’s video background remover makes this process simple and efficient. Below is a step-by-step guide on how to achieve professional-looking green screen effects using CapCut’s desktop editor.
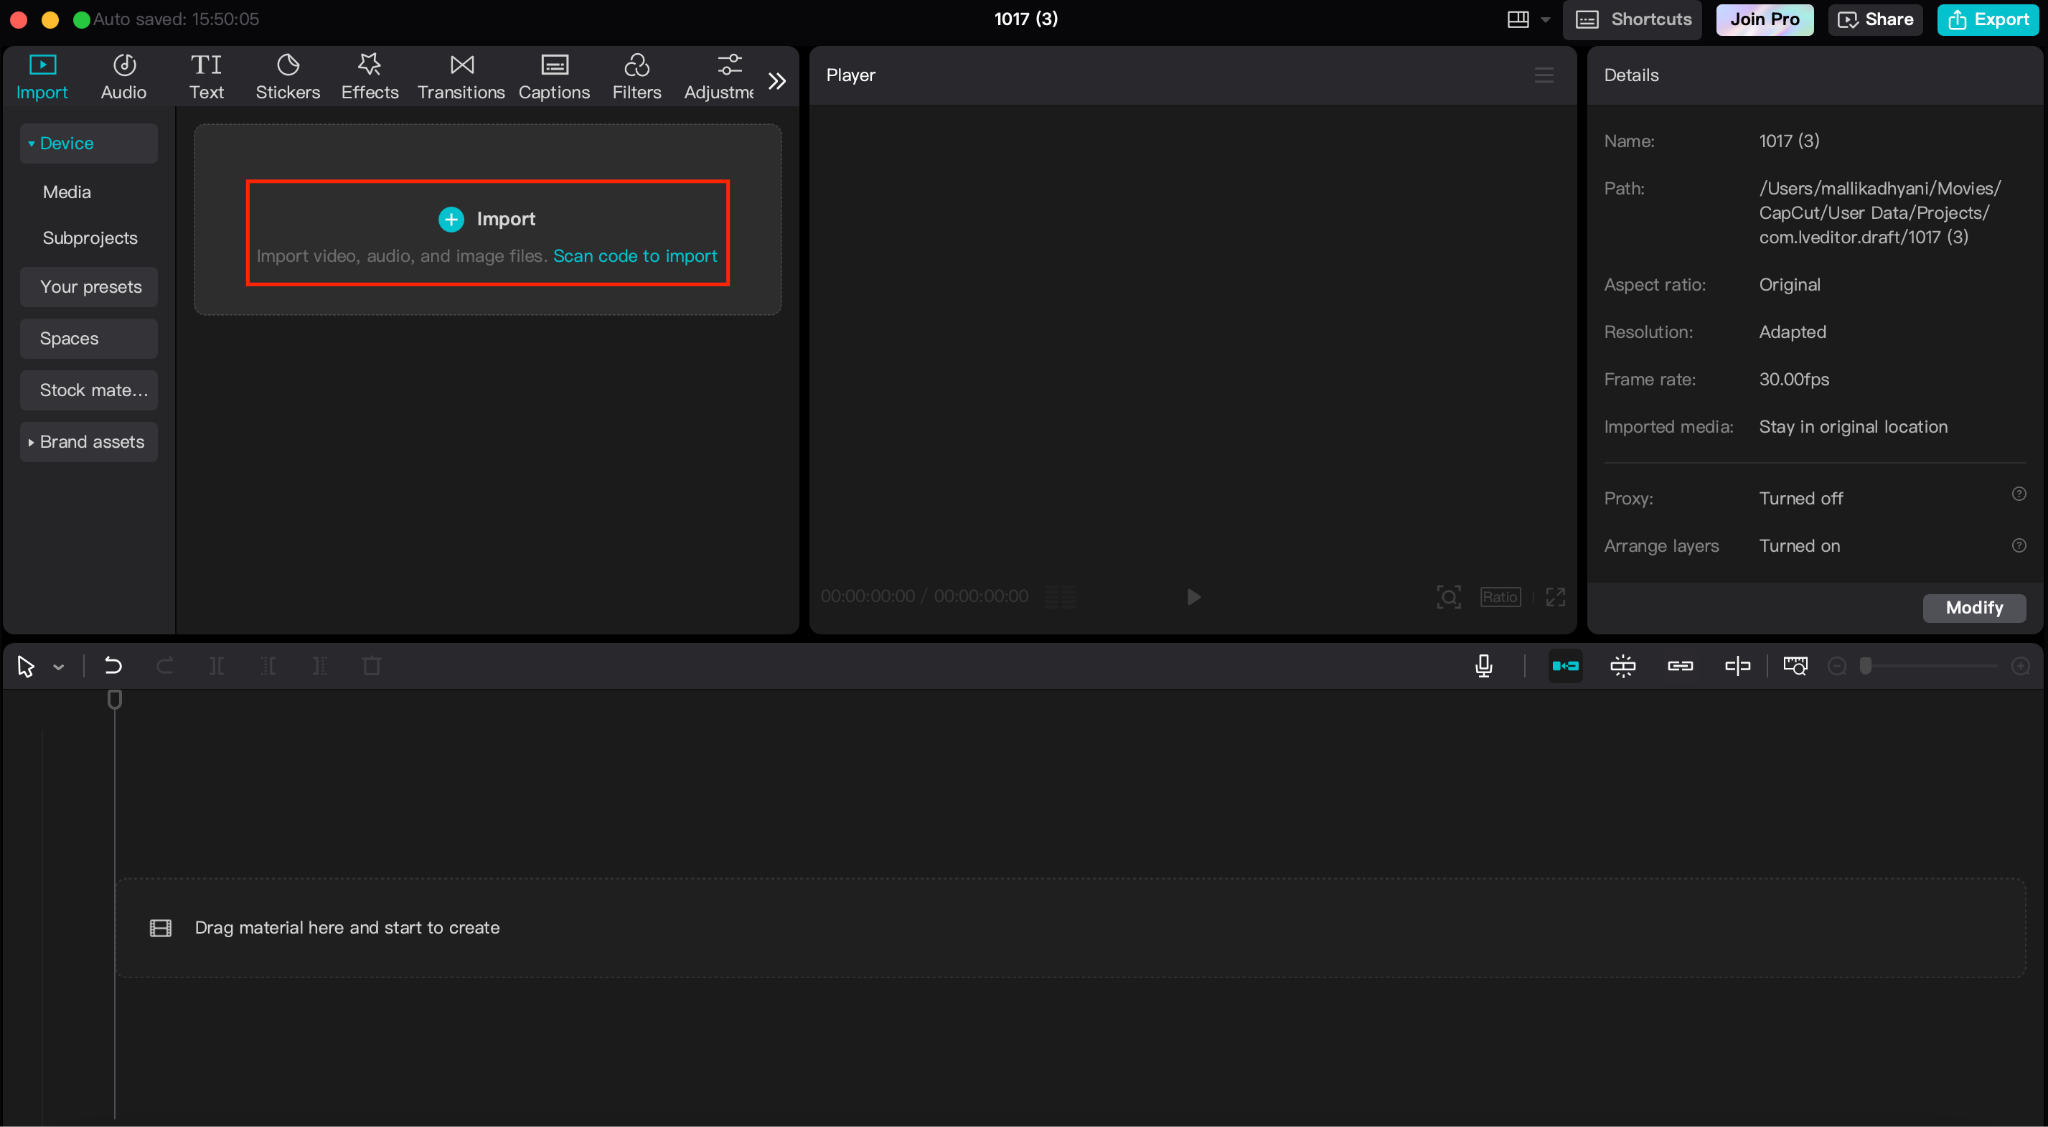
Step 1: Upload Your Video
Begin by uploading the video footage you want to edit into CapCut’s video editor. You can drag and drop your file onto the timeline for easy access. Whether you shot the video in a living room, outdoor setting, or any other environment, CapCut’s AI will automatically detect the subject and prepare it for background removal.
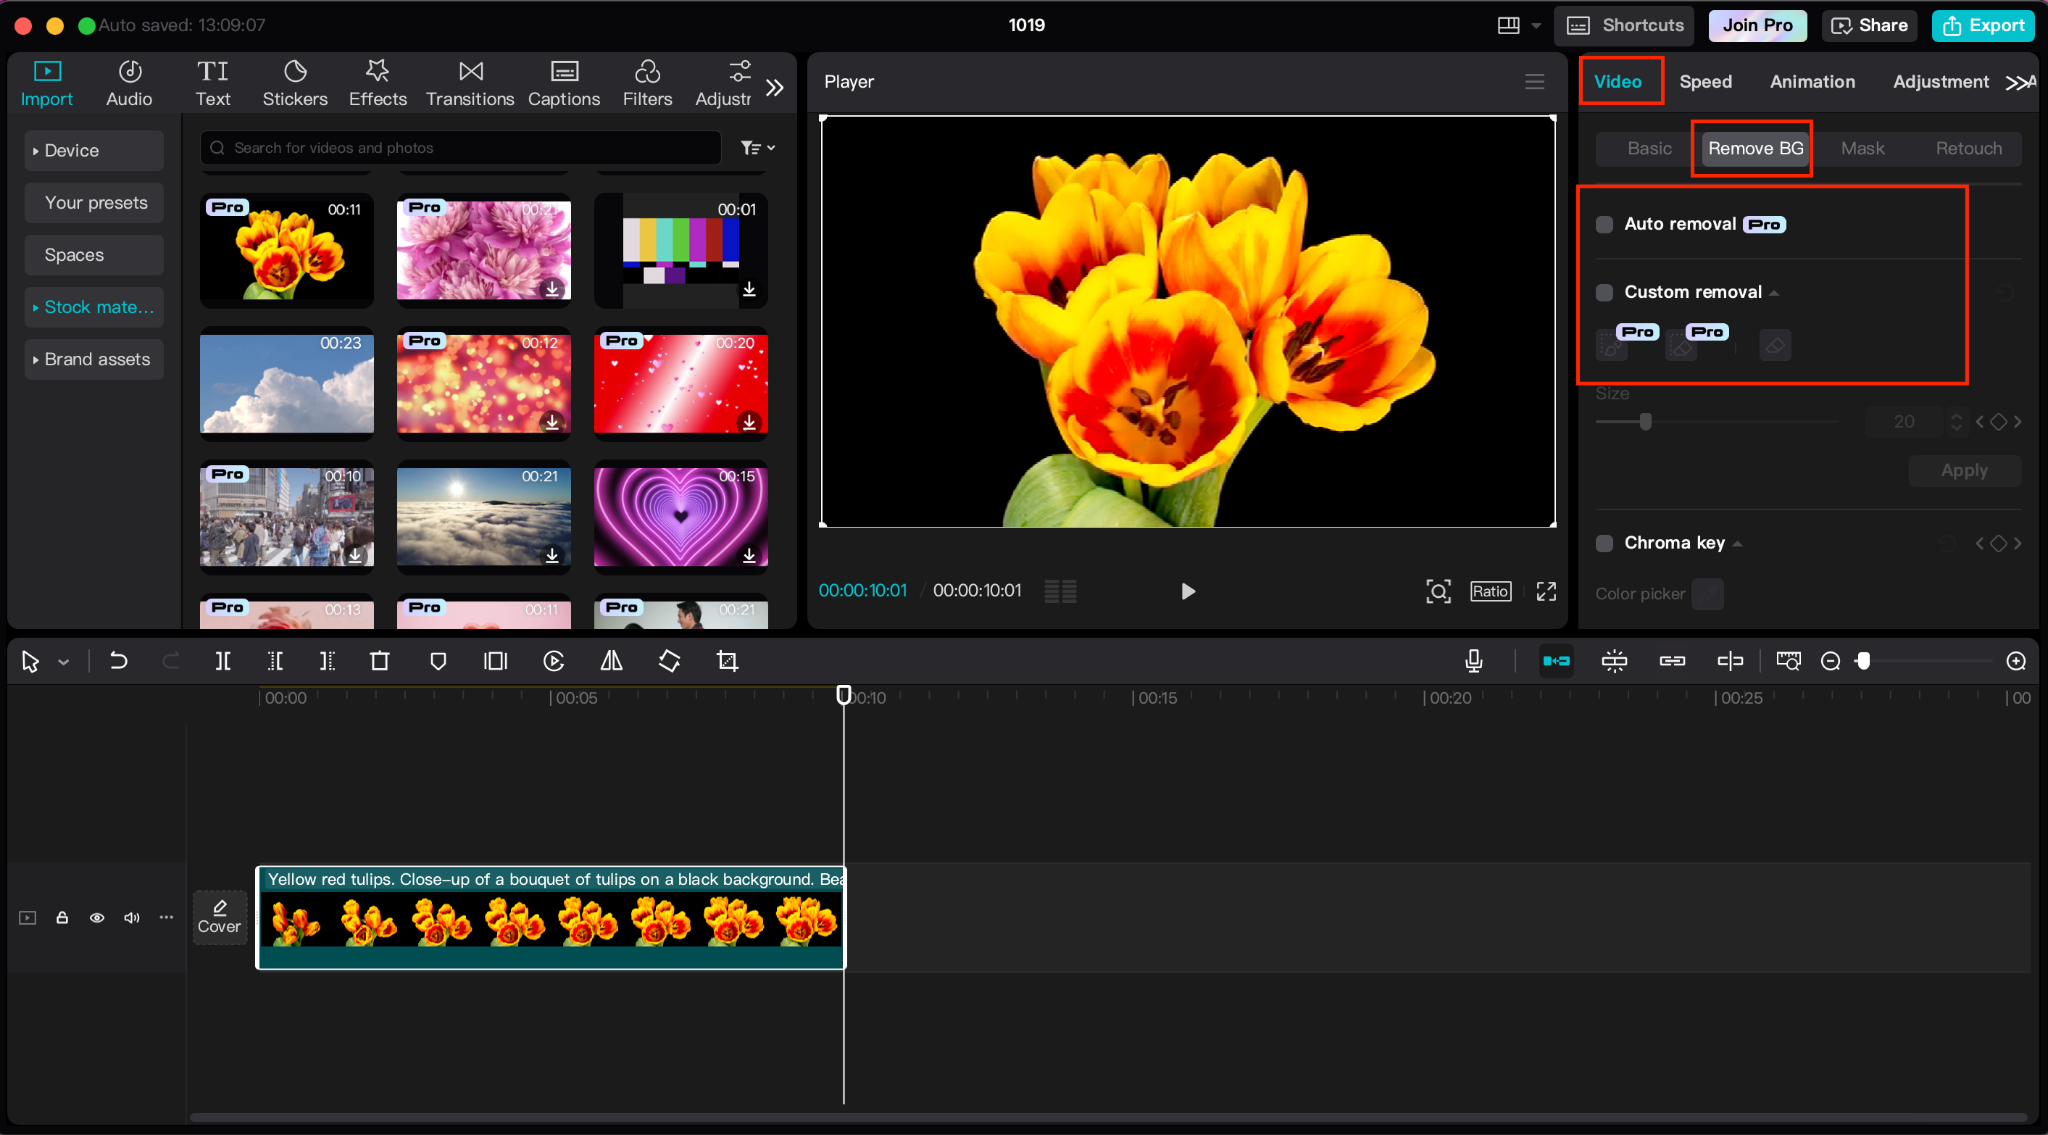
Step 2: Remove the Background
Once your video is on the timeline, locate the “Background Remover” feature in CapCut. Click on it, and the software will analyze your footage, automatically removing the background from the subject. No green screen is necessary. The AI-powered tool ensures that the subject is separated cleanly, allowing you to move on to the next step with ease.
Step 3: Sync and Finalize
Once your background is in place, review the video to ensure that the subject is seamlessly integrated into the new setting. Make any necessary adjustments, such as tweaking the lighting or color grading to match the background. Once you’re happy with the results, export the video in your desired format and resolution.

Using Text-to-Speech for Added Professionalism
Voiceovers can add a professional touch to any video, including product demos, tutorials, or marketing content. If you’re looking for a quick and easy way to generate voiceovers without hiring voice talent, CapCut’s text-to-speech tool is a powerful resource. Here’s how to use text-to-speech in CapCut:
Step 1: Open CapCut and Upload Your Video
After opening CapCut’s desktop software, upload your video as you normally would. Drag and drop the video file into the timeline, ensuring that the video is ready for audio overlay.

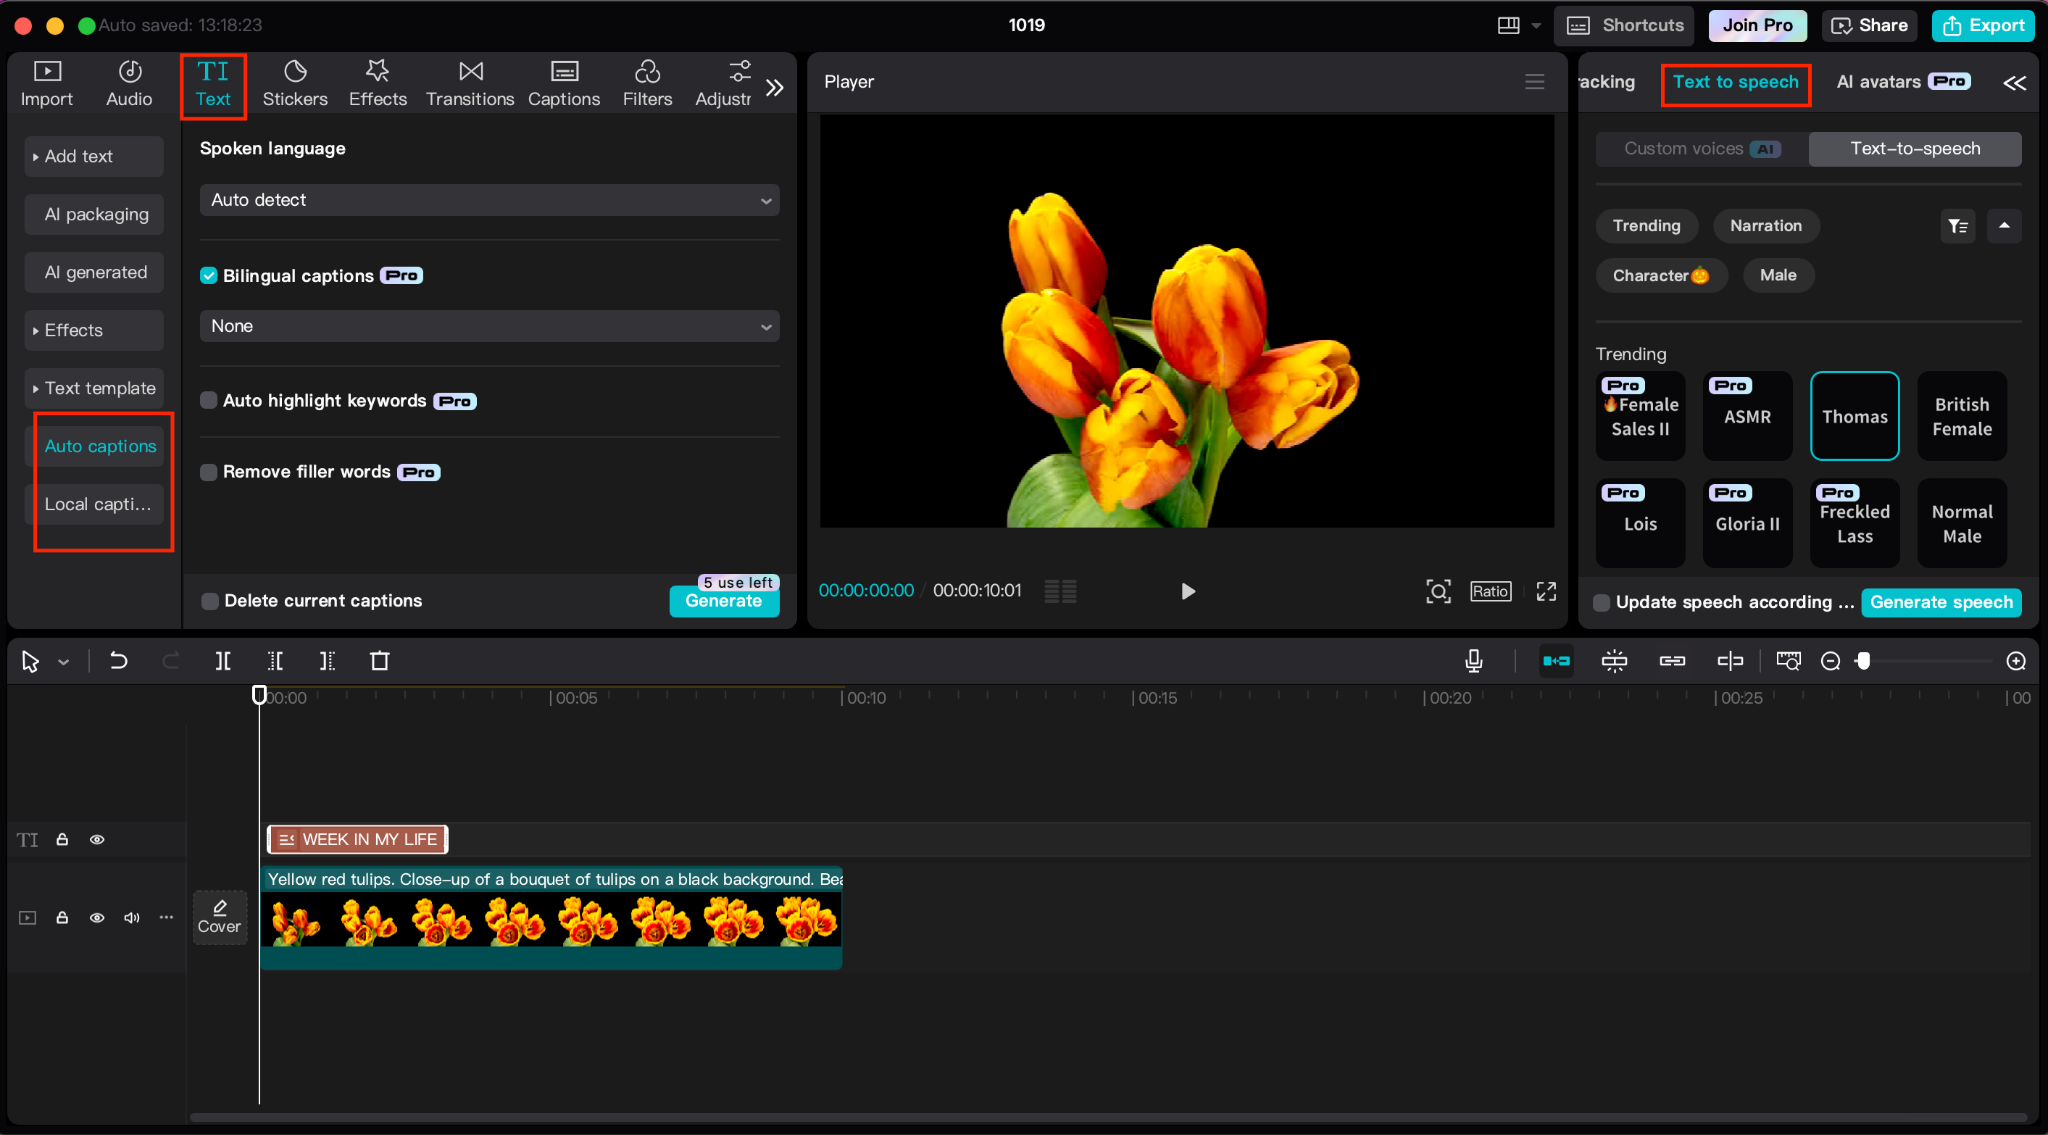
Step 2: Access the Text-to-Speech Tool
Once your video is uploaded, navigate to the text-to-speech feature. Type your script into the text box, making sure it aligns with the visuals in your video. Choose from the available voice options to match the tone and style you want for your video.
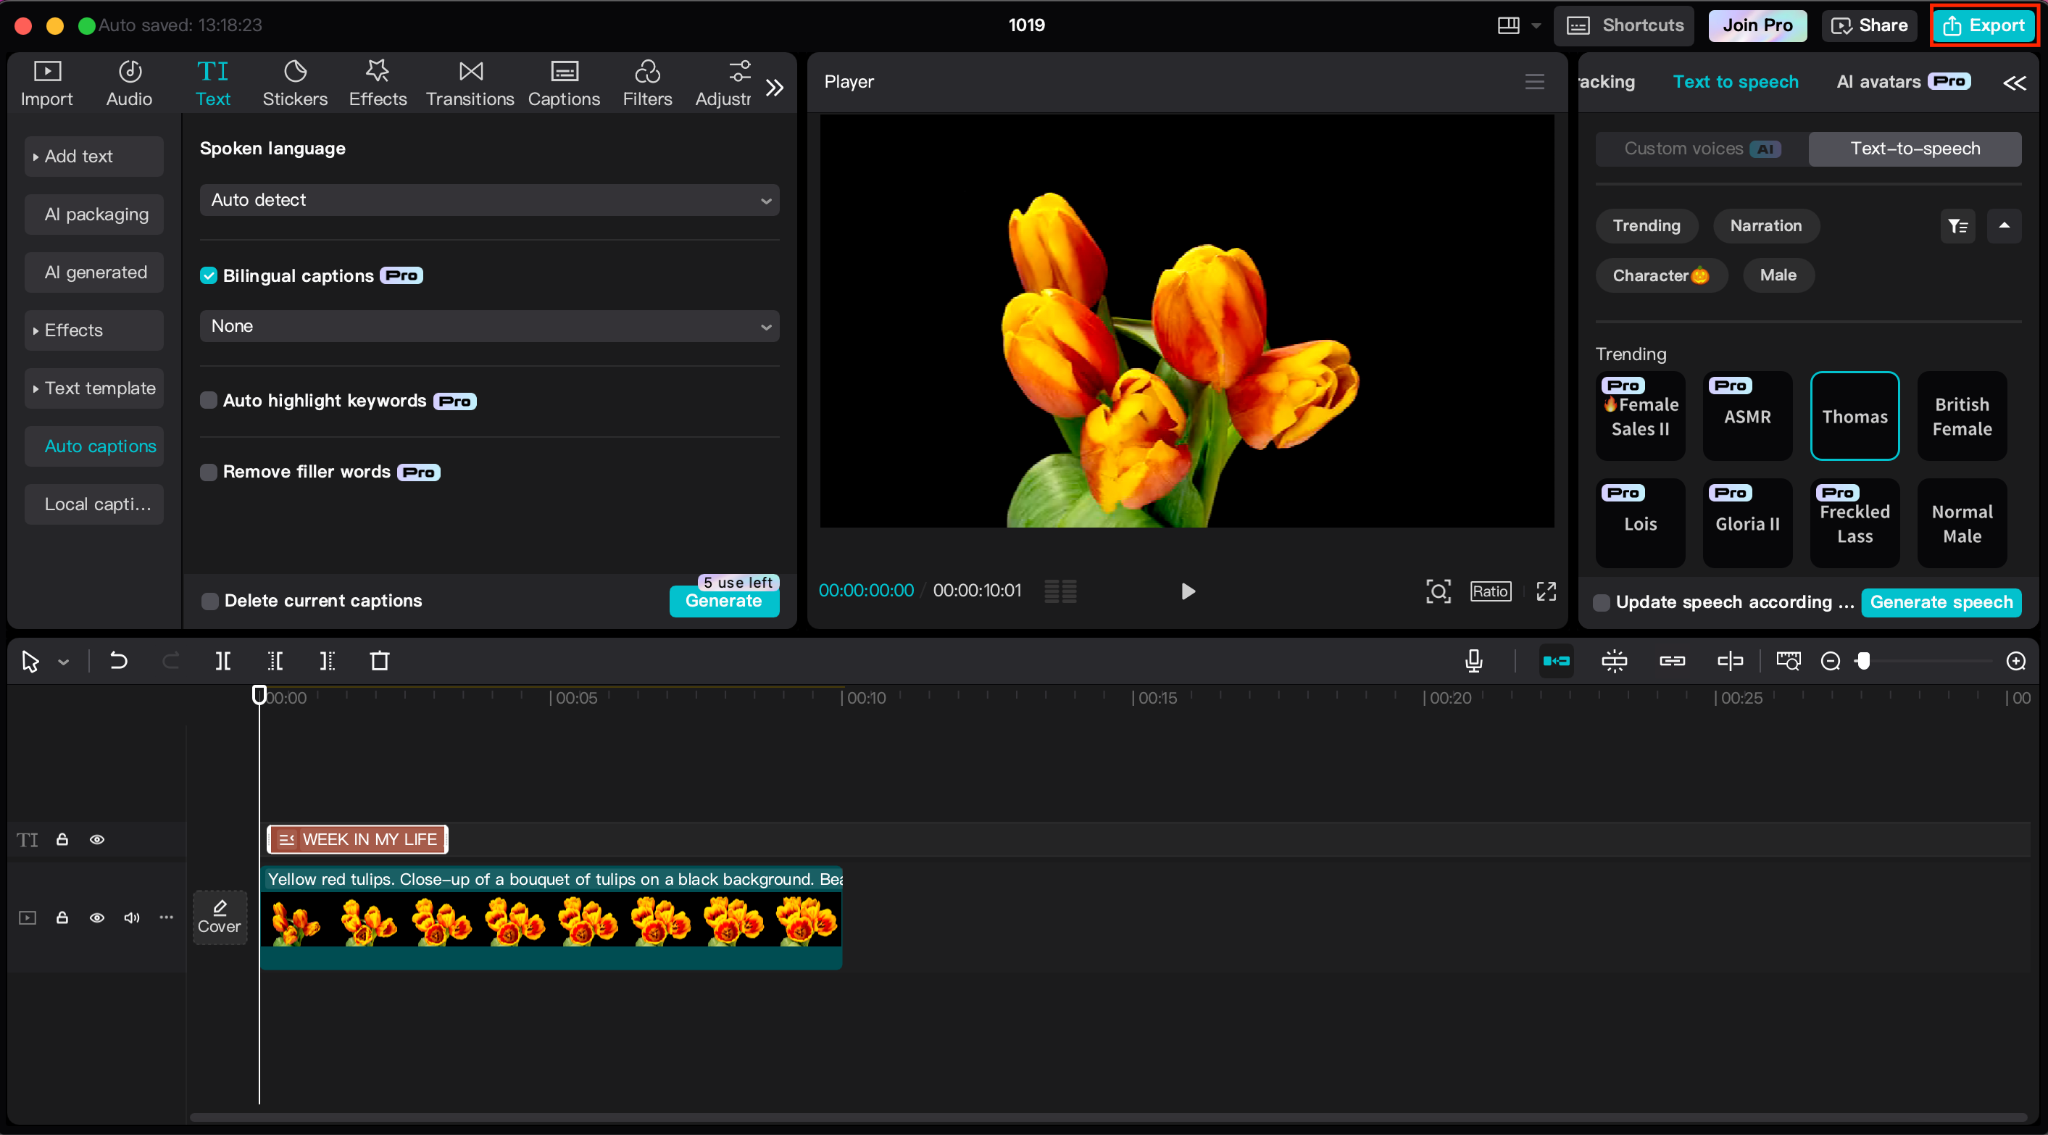
Step 3: Sync the Audio and Finalize
After generating the voiceover, drag the audio file onto the timeline and sync it with your video footage. Make any necessary adjustments to the pitch or speed to ensure it matches the pacing of your video. Once everything is in place, export the final video with the voiceover embedded.
By incorporating text-to-speech into your green screen effect videos, you can further enhance the professionalism and polish of your content without needing additional recording equipment.
Enhancing Accessibility with Captions
Adding captions to your videos can help expand your audience, making your content accessible to those with hearing impairments or those who prefer to watch videos without sound. CapCut’s caption generator simplifies the process of adding captions by automatically generating them based on your video’s audio.
By combining background removal, text-to-speech, and captions, you create videos that not only look professional but also reach a broader audience. This combination of tools ensures that your videos are both engaging and accessible, setting you apart in a competitive content landscape.
Conclusion
Simulating green screen effects using video background removers opens up a world of creative possibilities for content creators. Whether you’re producing professional marketing videos, fun YouTube content, or engaging tutorials, CapCut’s video background remover gives you the flexibility to customize your content and make it stand out.
With the added benefits of text-to-speech for voiceovers and automatic captions for accessibility, you can produce polished, high-quality videos without the need for expensive equipment or a large production team. By following this guide, you can master the art of background removal and green screen simulation, enhancing both the visual appeal and professionalism of your content.
