
As a Mac user, you may need to record your screen and audio for various reasons, such as creating tutorials, recording gameplay, capturing online meetings or webinars, capturing for video note taking, recording gameplay footage, creating software demos, or documenting a problem for technical support.
In this article, we will introduce how to record screens and audio on Mac using Gemoo Rcorder and QuickTime Player.
Method 1: Record Screen and Audio with Gemoo Recorder
The first method is to record screen and audio on Mac, namely Gemoo Recorder. If you want to play high-quality videos and add text, annotations, and other effects to your videos, Gemoo Recorder is your best choice. As a professional screen recording tool widely used in 2023, Gemoo Recorder can offer you many options – record screen, internal audio, microphone, and webcam simultaneously or separately.
More specifically, Gemoo Recorder can record online videos, live streams, webinars, gameplay, Skype calls, and more. The software supports recording in various resolutions up to 1080p and can save the recorded videos to the cloud, which is convenient for you to share with team members.
Gemoo Recorder Key features
- Offers a comprehensive recording solution that includes audio, video, camera, and external voice recording capabilities.
- Record both your screen and camera simultaneously, you can capture all the important details in one go.
- Customize and emphasize the content that you collect, ensuring that you capture everything you need.
- Whether you want to record your entire screen, a specific area, or a still image, Gemoo has you covered.
- Upload your recordings directly to the Gemoo Cloud without taking up valuable local memory on your device. With Gemoo, you can easily capture and share your content with ease.
Following steps to record screen and audio on Mac.
Step 1: Download and install Gemoo Recorder on your computer. Once installed, launch the application. A window will appear, prompting you to sign in to Gemoo. Please enter your account credentials, including your username and password, to log in to Gemoo Recorder.

Sign in for Gemoo
Step 2: To begin recording with Gemoo Recorder, choose the “Screen Only” mode and click the “Start Recording”button.
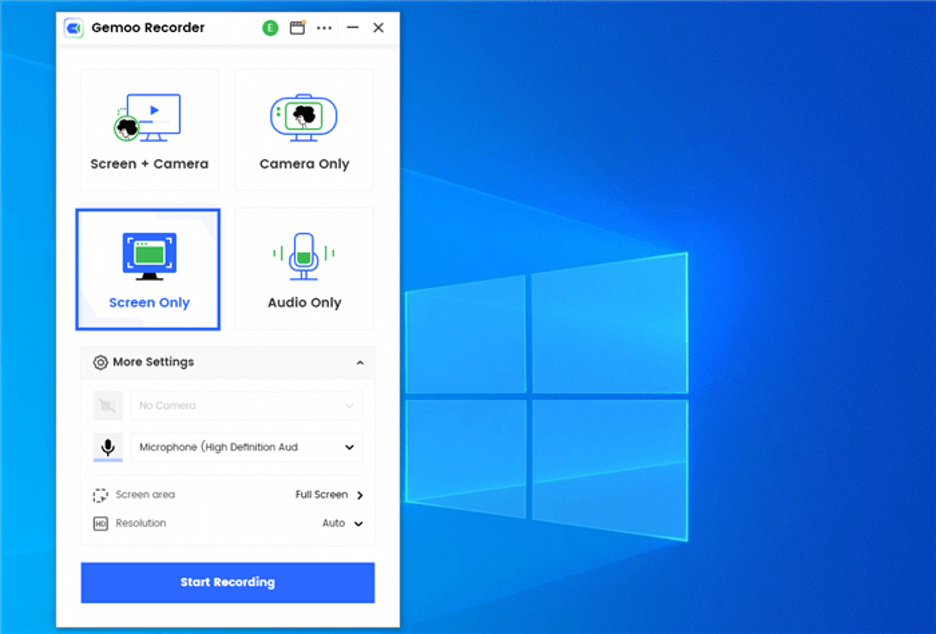
Select Screen Only Mode and Initiate Recording
Step 3: When you’re prepared to begin recording, a countdown will appear to assist you in getting ready. After a 3-second countdown, the recording will begin.
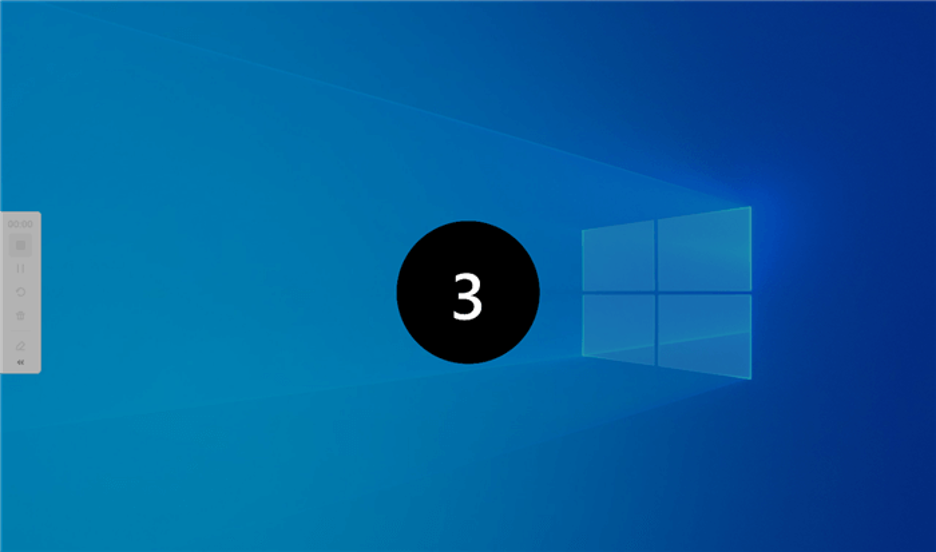
Wait for the Recording of Countdown
Step 4: With Gemoo Recorder, you can also edit your screen while recording. Simply click on the “Add Annotation” button to access the editing options.
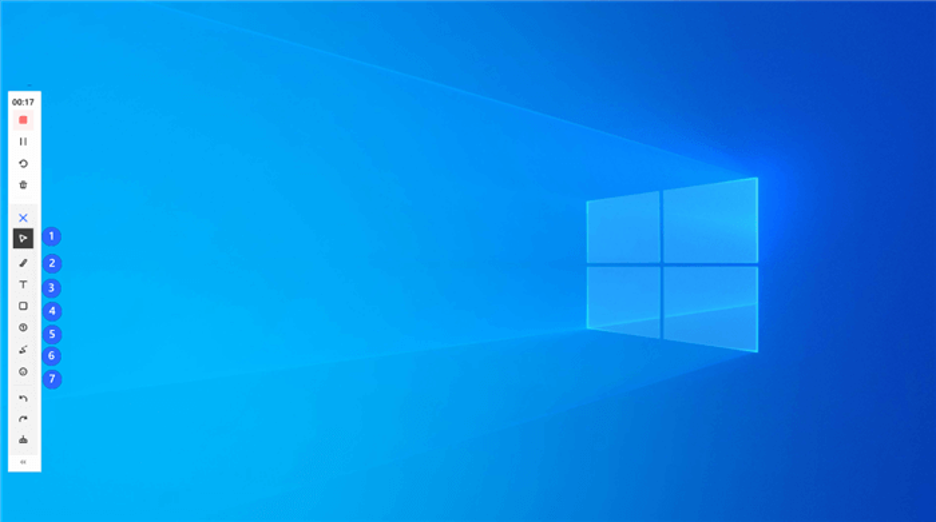
Annotate Screen during Recording
Step 5: To conclude the recording, you have the option to press either the red “Stop” button or the “Finish Recording” button.
Step 6: Ensure that your network connection is stable as the creation will be automatically uploaded to the Gemoo cloud. It is important to verify that the connection is strong.
Method 2: Record Screen and Audio with QuickTime Player
QuickTime Player is a multimedia player developed by Apple Inc. QuickTime Player is available for both Mac and Windows operating systems. QuickTime Player is a versatile media player that offers a range of features for playing and recording audio and video.
One of the key features of QuickTime Player is its ability to play high-quality videos. This makes it an ideal player for watching high-definition videos on your computer. It is easy to use and supports a wide range of formats, making it an essential tool for anyone who loves to watch or create multimedia content.
Here’s how to use it to record your screen and audio:
Step 1: Open QuickTime Player from the Applications folder or Spotlight search.
Step 2: Click “File” in the menu bar and select “New Screen Recording.”
Step 3: A screen recording window will appear. Click on the arrow next to the red record button to select the audio source, such as the built-in microphone or an external microphone.
Step 4: Click on the red record button to start recording. You can choose to record the entire screen or a specific portion by dragging the cursor over the area you want to record.
Step 5: When you’re done recording, click the stop button in the menu bar or press Command + Control + Esc.
Step 6: Save the recording by clicking “File” in the menu bar and selecting “Save.”
FAQ about Record Screen and Audio on Mac
- How do I export my screen recording after I’ve finished editing it?
This depends on the software you’re using. However, most software allows you to export your recording in various formats, such as MP4, MOV, or AVI.
- Can I record my screen and audio simultaneously using third-party software?
Yes, you can. Most third-party software allows you to record your screen and audio simultaneously, and some even offer advanced features such as webcam recording and live streaming.
- How do I troubleshoot audio recording issues on my Mac?
If you’re experiencing audio recording issues, make sure that your Mac’s audio settings are configured properly. You may also need to check your microphone and audio input device to ensure that they’re working correctly.
Conclusion
Recording your screen and audio on Mac is easy and convenient with built-in tools like QuickTime Player. However, if you need more advanced features, you can use third-party software like Gemoo recorder.. Whatever method you choose, make sure to test the audio and video quality before recording to ensure a successful recording.